Start Here: Installation of Atlas, WebAPI, CDM, webapi, and Required Prerequisites
Ponos: An Automated Build for an OHDSI Development or Production Environment
Click on this link for the Ponos Installation Process.Click on this link for a video demonstration of a Ponos install
(Set the video quality to HD/1080 if the video quality is not good, the link from this page should do it for you)
An Overview of Ponos
Ponos does a complete installation of Atlas, WebAPI, CDM, the webapi database, and all dependencies in 5 easy steps.- Step 1: Provision a machine to host Atlas/WebAPI/CDM/etc.
- Step 2: Download and run the _YES Installer to intall basic Java development tools
- Step 3: Run Installers that have not been automated (there's only 3: NPM, RTools, and PostgreSQL
- Step 4: Run the installer for Atlas/WebAPI/fhir-to-omop to clone, build, and deploy the fhir-to-omop tool suite, WebAPI, and Atlas
- Step 5: Run the fhir-to-omop atlas tool to run all of the manuall processes described below to create the CDM, webapi databases and all other dependencies required for Atlas/WebAPI/etc.
An Brief Description of Each of the Steps of Ponos
Ponos automates the build of an environment that can be used to run and develop Atlas as much as is possible. The Ponos automated build consists of the following steps. Each of the steps can be run individually as needed. All of the steps can be run to create a complete installation of Atlas and the tools needed for Atlas development.
-
Step 1: Provision a machine to host Atlas/WebAPI/CDM
We will need someplace to run our instance. The documentation for this project includes the set up of a brand new AWS EC2 Windows machine. This brand new Windows box is used as the starting point for a demonstration of a complete installation of Atlas/WebAPI/CDM with test data. -
Step 2: Download and run the _YES Installer
This installer installs most of the software required to run Atlas/WebAPI and create a CDM and optionally populate it with test data.- A Git client
- Maven (MVN)
- Java 8 and Java 11
- An Installer for NPM
- An Installer for PostgreSQL
- The JDBC driver required for PostgreSQL
- An Apache Tomcat server
- A Wildfly server
- A configured instance of Eclipse that is pre-integrated with Tomcat and Wildfly
- An instance of R
- An installer for RTools
- This install will update your path environment variable to point to the correct version of Java for this work
- This install provides some .bat files for some common tasks such as changing the version of Java being used
-
Step 3: Run Installers that have not been automated
For various reasons, the installers listed below have not been included in the automated process.-
Node Package Manager (NPM): This is used by the Atlas/WebAPI install.
This installer is included in the _YES distribution but needs to be run manually. -
PostgreSql: This is the database that we will use for the webapi and CDM databases.
This installer is included in the _YES distribution but needs to be run manually. -
RTools:
RTools is used by Achilles. The installer is over 4Gb and therefore not included in the _YES download (which is already big enough). A link to a standard version used for this process is provided so every installation using this process has the same instance of RTools.
-
Node Package Manager (NPM): This is used by the Atlas/WebAPI install.
-
Step 4: Run the installer for Atlas/WebAPI/fhir-to-omop
This installer clones, checks out a specific version, and builds and deploys the Atlas, WebAPI, and fhir-to-omop applications from github. The fhir-to-omop project contains the tool that is used to build our instance of CDM. -
Step 5: Run the fhir-to-omop atlas tool
This application builds a complete instance of CDM including- Clean up (deleting) the old environment
- Create the Atlas database users
- Create the WebAPI schema
- Create the WebAPI schema tables
- Create the Achilles schemas
- Create the Achilles schema tables
- Grant all required privileges
- Create Atlas source records in the webapi scheam
- Create an instance of the Common Data Model (CDM)
- Create the Synthea native schema (the ETL-synthea tool is used to populate the CDM with test data)
- Download and install a complete set of terminology tables from a standard source (alternatively, a custom terminology source can be specified and used)
- Install a complete test data set using ETL-Synthea
- Run Achilles to populate the Achilles Tables used by Atlas
Manual Installation of Atlas, WebAPI, and Dependencies
The existing process for installing Atlas, WebAPI, and the Dependencies is a manual process. Instructions for this process spread accross many projects. These instructions must be followed very carefully and executed in a specific order. This process is very time consuming and very prone to error. The manual process to install Atlas/WebAPI/etc. is defined by the resources listed below. The Ponos process automates this process.WebAPI Deployment: The following are the high-level steps for deploying WebAPI
Pre-requite software is listed here:
https://github.com/OHDSI/WebAPI/wiki/WebAPI-Installation-Guide
Install and configure a PostreSQL server, database and users for use when deploying WebAPI:
https://github.com/OHDSI/WebAPI/wiki/PostgreSQL-Installation-Guide.
Verify the database connectivity:
https://github.com/OHDSI/WebAPI/wiki/WebAPI-Installation-Guide#test-the-database-connection
Install WebAPI:
https://github.com/OHDSI/WebAPI/wiki/WebAPI-Installation-Guide#installing-webapi
Deploy WebAPI to Tomcat:
https://github.com/OHDSI/WebAPI/wiki/WebAPI-Installation-Guide#deploy-webapi-to-tomcat
Verify deployment:
https://github.com/OHDSI/WebAPI/wiki/WebAPI-Installation-Guide#verify-webapi-deployment
Troubleshooting FAQ:
https://github.com/OHDSI/WebAPI/wiki/WebAPI-Installation-Guide#troubleshooting
Configure the CDM for use with WebAPI:
https://github.com/OHDSI/WebAPI/wiki/CDM-Configuration
Atlas deployment
The ATLAS setup guide is found here:
https://github.com/OHDSI/Atlas/wiki/Atlas-Setup-Guide. The high level steps include:
Troubleshooting guide:
https://github.com/OHDSI/Atlas/wiki/Atlas-Setup-Guide#troubleshooting
Manually Installing Dependencies and First Steps with fhir-to-omop Tools
This section gives instructions on how to manually install some of the tools needed for WebAPI, Atlas, and fhir-to-omop.
Introduction
This section will show you the steps to install and get started with fhir-to-omop as a developer. This section is retained as it was used to guide the development of the automated, and thereby standardized, build of the WebAPI/Atlas/fhir-to-omop development environment. You should really use the automated build described above.
Getting started with fhir-to-omop means different things to different users. The fhir-to-omop project includes several tools including utilities to download FHIR resources from a FHIR server in a highly paralleized and scalable way, tools for converting FHIR to OMOP, tools for writing data to OMOP, as well as several other tools and utilities. We suggest looking at the fhir-to-omop Tools and Utilities page for the functionality you are interested in.
Prerequisites
Don't panic, the list below are the prerequisites to get started as a developer on the fhir-to-omop team. The fhir-to-omop tool suit is also available as a Standalone Application. The only prerequisites for the Standalone application are a MS Sql Server database, terminology files from Athena, and Java.List of prerequisites
Note: A new UMLS licence can take up to 3 business days to process. Do this first ! ! !
The following resources are required for the fhir-to-omop tool suite. Links to how to get each of these resources are shown in the next section.
- Java: fhir-to-omop is a suite of Java applications.
- Git: Git used to download fhir-to-omop
- Maven: MVN is used to build the project from source files
- MS Sql Server: An installation of Microsoft Sql Server used as the database to host the OMOP instance we will be creating, and a download of the terminology tables from OHDSI Athena.
- It is also helpful to have Microsoft Sql Server Management Studio (MSSM) installed.
- MS Sql Server JDBC Driver: Used by applications to connect to your OMOP instance.
- Eclipse (or other IDE): It is also useful to have an integrated development environment (IDE). I prefer Eclipse (because I'm older than the mountains... at least I'm not using emaccs, because I'm younger than the trees).
- An identity provider. I'm using secure.login.gov. Others such as Microsoft or Google (gmail) can also be used.
- A UMLS Account: Some of the terminologies used in OMOP require a UMLS account.
- A UMLS API Key: This is required to integrate CPT codes after the terminology has been downloaded.
- An OHDSI Athena account: Athena will be used to download the terminologies we will add to our OHDSI implementation
- A Synthea SyntheticMass Account and Application ID
- R and RStudio: R and RStudio are used for tools like the Data Quality Dashboard
- PostgreSql 10: PostgreSql 10 is required if you want to install an instance of Atlas (you definitely want to install an instance of Atlas)
Links to Instructions on How to Get Prerequisites
Instructions for each are in the pages shown below.- Install Java
- Install Git
- Install Maven (MVN)
- Install Microsoft Sql Server
- Install Eclipse
- Get A secure.login.gov Account
- Get UMLS Account
- Get UMLS API Key
- Get Athena Login
- Download the OMOP Terminology to be used for your OMOP instance
- Create a Synthea Account and Application ID
- Install R and RStudio
- Install PostgreSql
Versions
The current version of fhir-to-omop has been built and tested using the following versions of the above tools:- Windows: Windows 10 Home version 21H2, OS Build 19044.1526, Experience Windows Feature Experience Pack 120.2212_4170.0
- Java: java version "1.8.0_261", Java(TM) SE Runtime Environment (build 1.8.0_261-b12), Java HotSpot(TM) 64-Bit Server VM (build 25.261-b12, mixed mode)
- Git: git version 2.27.0.windows.1
- Maven: MVN version 3.8.5 installed from apache-maven-3.8.5-bin.zip.
- MS Sql Server (64 bit): Microsoft SQL Server 2019 (RTM-GDR) (KB4583458) - 15.0.2080.9 (X64) Nov 6 2020 16:50:01 Copyright (C) 2019 Microsoft Corporation Developer Edition (64-bit) on Windows 10 Home 10.0
(Build 19044: ) (Hypervisor) - MS Sql Server Management Studio (SSMS): 15.0.18390.0
- MS Sql Server JDBC jar file: mssql-jdbc-10.2.0.jre8.jar
- Eclipse: Eclipse IDE for Enterprise Java and Web Developers (includes Incubating components), Version: 2021-09 (4.21.0), Build id: 20210910-1417, OS: Windows 10, v.10.0, x86_64 / win32, Java vendor: Oracle Corporation, Java runtime version: 16.0.2+7-67, Java version: 16.0.2
- OMOP Terminology: The versions downloaded are listed here
- R: R was installed from rtools40-x86_64.exe
- RStudio: RStudio was installed from RStudio-1.4.1103.exe
- PostgreSql: PostgreSql was installed from PostgreSql 10.21-1.
Download and Install fhir-to-omop
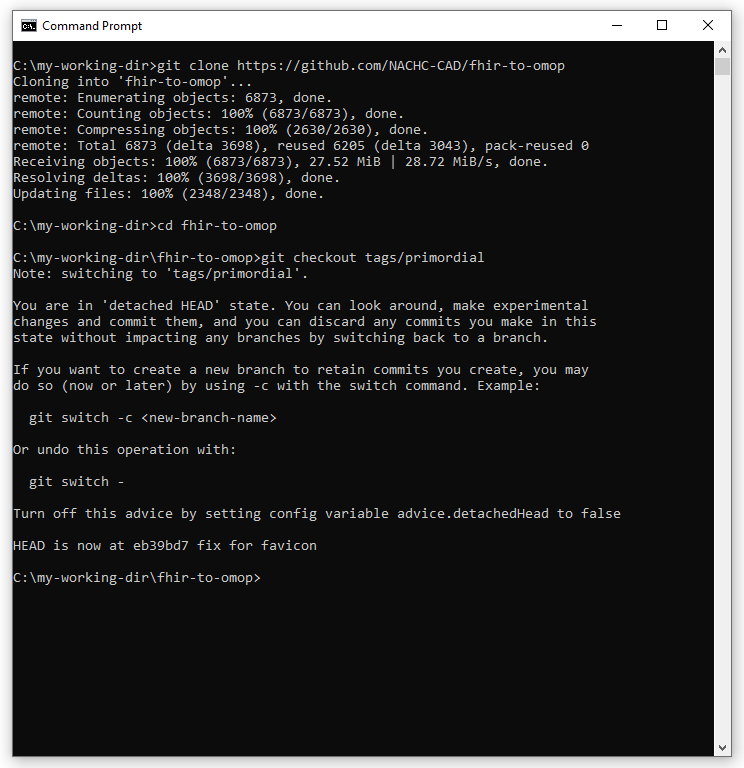
The fhir-to-omop tools can be downloaded and installed by simply checking out the fhir-to-omop project from github using the following.
git clone https://github.com/NACHC-CAD/fhir-to-omop
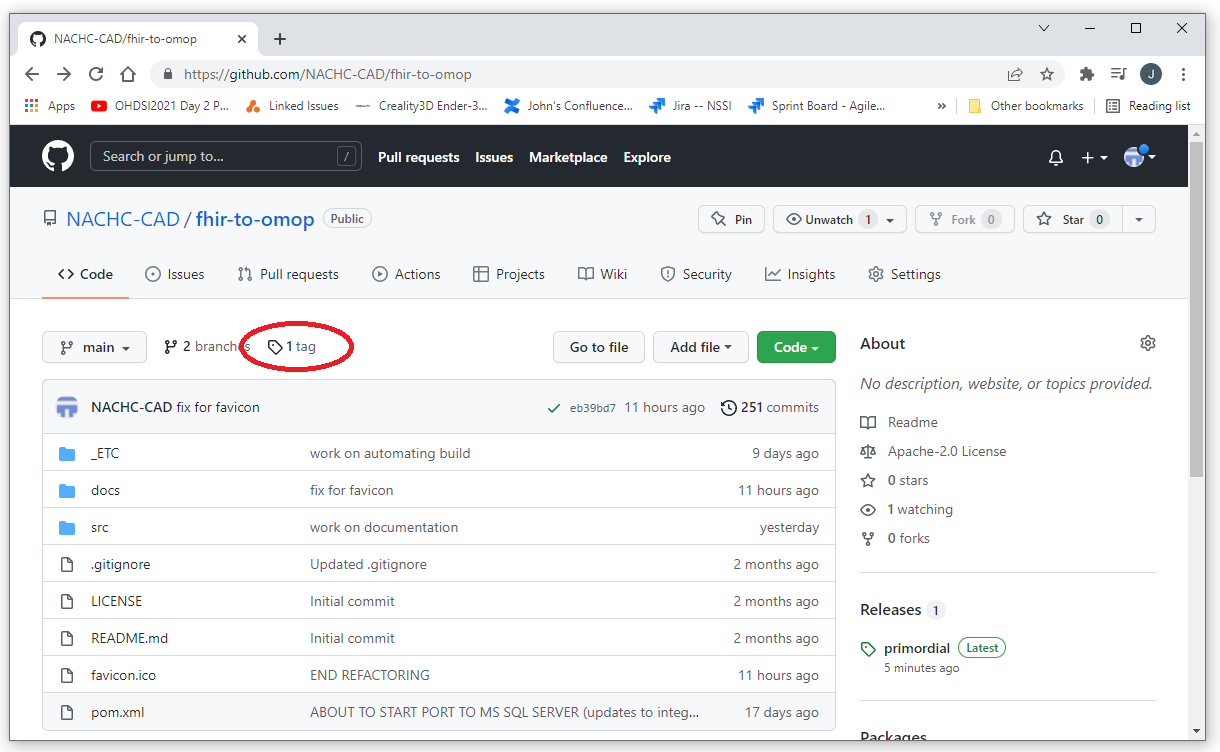
Then switch to the tag you want to use as shown below (kind of, you definitely do NOT want the primordial branch)
git checkout tags/primordial
This project uses tags like v0.0.0. You probably want the most recent tag.
You can find the most recent tag by going to
https://github.com/NACHC-CAD/fhir-to-omop
and then selecting the tag link.